こんにちは、中の人です。
今回も前回の『 AWS Supportをsdk for phpから使ってみた② 』に引き続き、aws sdk for phpを使って、AWS Supportにケースの作成・閲覧・返信・クローズを出来るようにします。
複数のアカウントを管理している方やちょっとした問い合わせがしたい時にログインしないといけない手間がなくなるので、一部のユーザーには重宝します。
フロントをHTML5で実装し、ajaxでデータを呼び出すようにしています。
今回は第3回としてケースクローズとオープンを行います。
- 既に登録済みのケースをクローズにします。
aws_ResolveCase.php
なお、ケースIDはケース一覧取得したものをGETで引き渡すものとします。
./aws_ResolveCase.php?case= case-***
1<?php23# credentialファイルの呼び出し45$credential_path = "./.aws/credentials";6if(!file_exists($credential_path)){7 exit("定義ファイルがありません");8}910# aws sdk for phpを呼び出し1112require_once("./vendor/autoload.php");13use Aws\Support\SupportClient;1415# credentialsのどちらかのユーザーを指定します。1617$profile = "user1";1819$client = SupportClient::factory(array(20 'profile' => $profile,21 'region' => 'us-east-1',// サポートはUS eastのみ22));2324$case = $_GET['case'];2526$client = SupportClient::factory(array(27 'profile' => $profile,28 'region' => 'us-east-1',// サポートはUS east以外NG29));3031# ケースが無い場合はエラー3233if(!$case){34 echo "no case";35 exit();36}3738$result = $client->ResolveCase(array(39 'caseId' => $case,40));4142echo json_encode($result);4344exit();上記を実行すると、ケースをクローズすることが出来ます。
- 続いて新規ケースの作成についてです。
新規ケースを作成するには
$result = $client->describeServices();
でサービス、カテゴリの一覧を取得する必要があります。
aws_describeServices.php
1<?php23# credentialファイルの呼び出し45$credential_path = "./.aws/credentials";6if(!file_exists($credential_path)){7 exit("定義ファイルがありません");8}910# aws sdk for phpを呼び出し1112require_once("./vendor/autoload.php");13use Aws\Support\SupportClient;1415# credentialsのどちらかのユーザーを指定します。1617$profile = "user1";1819$client = SupportClient::factory(array(20 'profile' => $profile,21 'region' => 'us-east-1',// サポートはUS eastのみ22));2324$case = $_GET['case'];2526$client = SupportClient::factory(array(27 'profile' => $profile,28 'region' => 'us-east-1',// サポートはUS east以外NG29));3031$result = $client->describeServices();3233echo json_encode($result);3435exit();また、ケースを作成するスクリプトを用意します。
aws_createCase.php
1<?php23# credentialファイルの呼び出し45$credential_path = "./.aws/credentials";6if(!file_exists($credential_path)){7 exit("定義ファイルがありません");8}910# aws sdk for phpを呼び出し1112require_once("./vendor/autoload.php");13use Aws\Support\SupportClient;1415# credentialsのどちらかのユーザーを指定します。1617$profile = "user1";1819$client = SupportClient::factory(array(20 'profile' => $profile,21 'region' => 'us-east-1',// サポートはUS eastのみ22));2324$result = $client->createCase(array(25 'serviceCode' => $_POST['serviceCode'],// aws_describeServicesで取得26 'severityCode' => $_POST['severityCode'],// 優先度27 'categoryCode' => $_POST['categoryCode'], // aws_describeServicesで取得28 'subject' => $_POST['subject'],29 'communicationBody' => $_POST['body'],30 'language' => 'ja',31 'issueType' => 'technical', 32));3334$caseId = $result['caseId'];3536echo $caseId;3738exit();投稿側のHTMLについては
createCase.html
にて作成しております。
1<!DOCTYPE html>2<html lang="ja">3<head>4<meta charset="utf-8">5<title>ケース作成</title>6<script src="http://code.jquery.com/jquery.min.js"></script>7<script>8$.ajax({9 url: 'script/aws_describeServices.php',10 type: "POST",11 dataType: 'json',12 success: function( json ) {13 var len = json.length;14 var makerArray = {};15 $("#serviceCode").append($('<option value="" selected="selected">選択</option>'));16 17 // サービス取得18 for (var key in json) {19 var tempArray = {};2021 $("#serviceCode").append($('<option value="' + json[key].code + '">' + json[key].name + '</option>'));22 23 // カテゴリ取得24 var len2 = json[key].categories.length;25 for(var j=0; j < len2; j++){26 tempArray[(j+1)] = new Array( json[key].categories[j].code , json[key].categories[j].name);27 }28 makerArray[json[key].code] = tempArray;2930 }31 $("body").pulldownChange("serviceCode", "categoryCode", makerArray);32 },33 complete : function(dataRes) {34 console.log("jsonデータ取得完了");35 }36});3738// select内容により次のselectを変更39$.fn.pulldownChange = function(targetid, changeid, changeItemArray){ 40 $("#" + targetid).change(function(){41 value = $(this).val(); 42 $("#" + changeid).children().remove();43 changePulldown = changeItemArray[value]; 44 changeSellectNode = window.document.getElementById(changeid);4546 // 1項目目を選択として追加47 changeSellectNode.options[0] = new Option("選択", "");48 for (var key in changePulldown) {49 changeSellectNode.options[key] = new Option(changePulldown[key][1], changePulldown[key][0]);50 }51 52 changeSellectNode.selectedIndex = 0;53 });54}5556jQuery(document).on("click", "#submit", function(){57 var serviceCode = $('select#serviceCode').val();58 var categoryCode = $('select#categoryCode').val();59 var severityCode = $('select#severityCode').val();60 var subject = $("#subject").val();61 var body = $("textarea").val();6263 var dataRes = "profile=" + window.localStorage.getItem("account") + "&serviceCode=" + serviceCode + "&categoryCode=" + categoryCode + "&severityCode=" + severityCode + "&subject=" + subject + "&body=" + body;64 65 if(!serviceCode){66 alert("サービスを選択して下さい");67 $("select#serviceCode").focus();68 return;69 } else if(!categoryCode){70 alert("カテゴリを選択して下さい");71 $("select#categoryCode").focus();72 return;73 } else if(!severityCode){74 alert("緊急度を選択してください");75 $("select#severityCode").focus();76 return;77 } else if(!subject){78 alert("タイトルを入力して下さい");79 $("select#severityCode").focus();80 return;81 } else if(!body){82 alert("ケース内容を入力して下さい");83 $("textarea").focus();84 return;85 } else if (confirm('ケースを作成します。\nよろしいですか?')) { 86 $.ajax({87 url: 'script/aws_createCase.php',88 type: "POST",89 data: dataRes,90 dataType: 'text',91 success: function( caseId ) {92 re = new RegExp("case-", "i");93 if (caseId.match(re)) {94 $("#form").remove();95 alert("ケースを作成しました。");96 }else{97 alert("ケースを作成に失敗しました。ManagementConsoleを確認して下さい");98 }99 },error: function(XMLHttpRequest, textStatus, errorThrown) {100 $("#XMLHttpRequest").html("XMLHttpRequest : " + XMLHttpRequest.status);101 $("#textStatus").html("textStatus : " + textStatus);102 $("#errorThrown").html("errorThrown : " + errorThrown.message);103 },104 complete : function(dataRes) {105 console.timeEnd("json");106 console.log("jsonデータ取得完了");107 }108 }); 109 }110});111</script>112</head>113114<body id="chat">115 116 <div id="header">117 <h1>新規ケースをオープン</h1>118 </div>119 120 <div id="chatarea">121 <ul>122 </ul>123 124 <ul class="form" id="form">125 <li>サービス: 126 <select name="serviceCode" id="serviceCode" style="width: 30%;">127 <option value=""></option>128 </select></li>129 <li>カテゴリ: 130 <select name="categoryCode" id="categoryCode" style="width: 30%;">131 <option value=""></option>132 </select></li>133 <li>緊急度: 134 <select name="severityCode" id="severityCode" style="width: 30%;">135 <option value="">選択</option>136 <option value="urgent">緊急</option>137 <option value="high">高</option>138 <option value="normal" selected="selected">普通</option>139 <option value="low">低</option>140 </select></li>141142 <li>タイトル:<input type="text" name="subject" id="subject" value="" style="width: 70%;" /></li>143 <li><textarea placeholder="ケースを作成"></textarea></li>144 <li><span id="submit" onclick="">送信</span></li></ul>145 </div> 146</body>147</html>いかがでしたでしょうか?
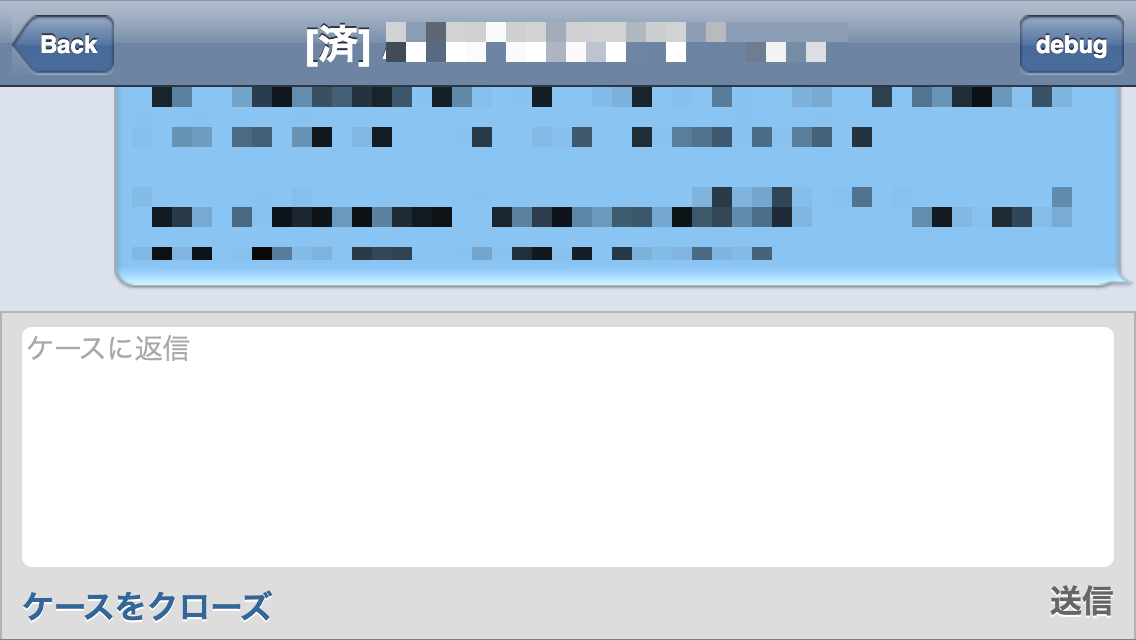
デザインを適用することで以下のようにスマートフォンから利用する事も出来ます。