渡邊です。
前回記事(http://recipe.kc-cloud.jp/archives/10963)ではマネジメントコンソールからRekognitionの画像認識を試してみました。Rekognitionはマネジメントコンソールだけでなく、AWS CLIコマンドから使ったり、AWS SDKでPythonなどのプログラミング言語から呼び出すこともできます。
今回はAWS SDK for Python (Boto3)を使ってEC2インスタンスからRekognitionを試してみます。
IAMロール作成
まず最初に必要なIAM権限を付与します。
Rekognitionを実行するための実行権限と、S3上の画像認識も試すのでS3へのアクセス権限を付与します。
今回はIAMロールを作成してEC2インスタンスに付与するやり方でいきます。
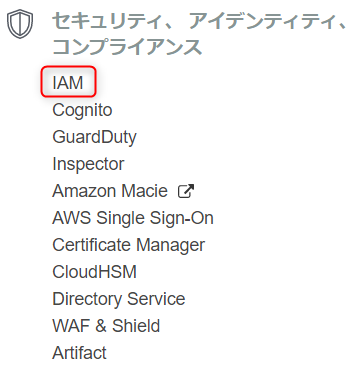
サービスで『IAM』を選択します。
『ロール』を選択します。
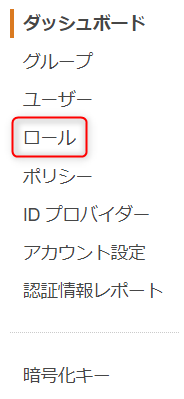
『ロールの作成』ボタンを押下します。

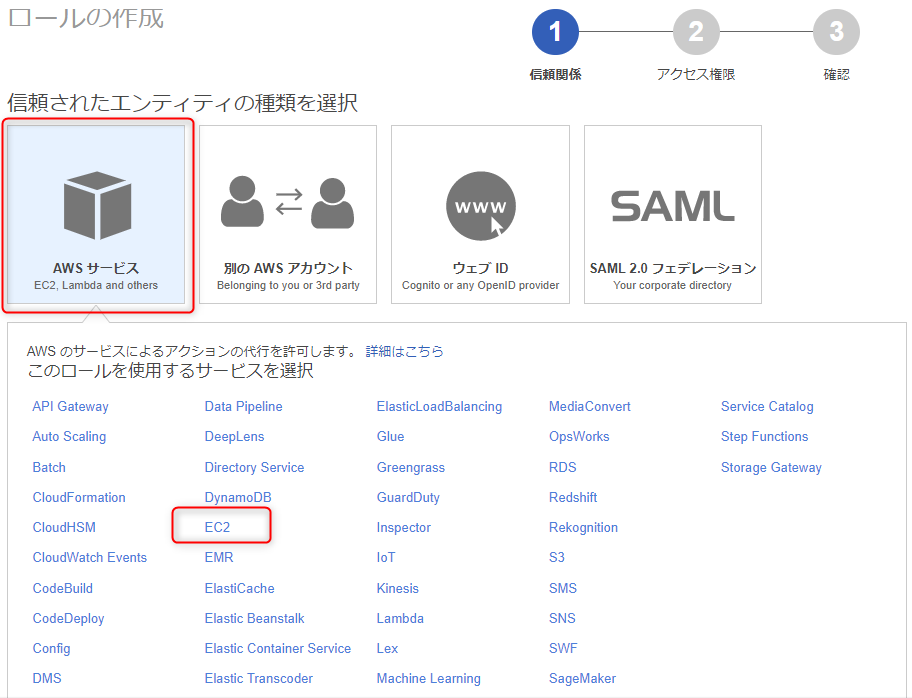
ロールを使用するサービスとして『EC2』を選択します。
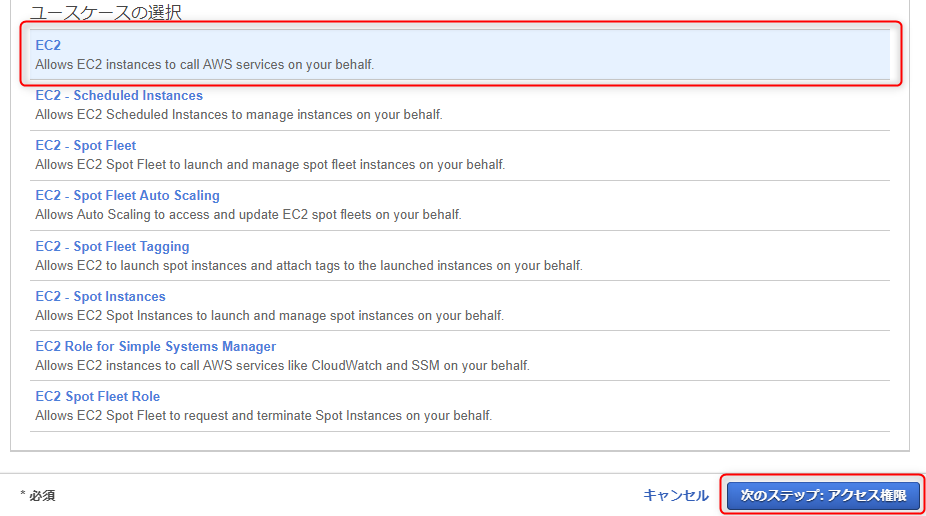
ユースケースとして『EC2』を選択します。
『AmazonRekognition』で検索し、『AmazonRekognitionFullAccess』のチェックボックスをチェックします。

『AmazonS3』で検索し、『AmazonS3FullAccess』のチェックボックスをチェックして、『次のステップ:確認』ボタンを押下します。

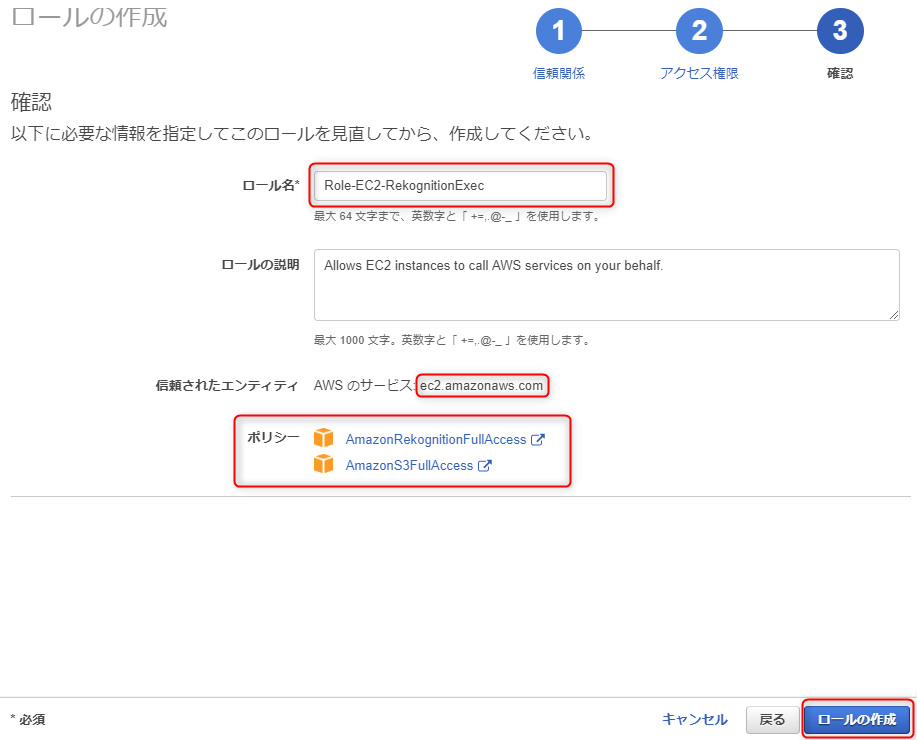
ロール名を入力します。
『信頼されたエンティティ』に『EC2』、
『ポリシー』に『AmazonRekognitionFullAccess』『AmazonS3FullAccess』があることを確認して、
『ロールの作成』ボタンを押下します。
EC2インスタンス作成
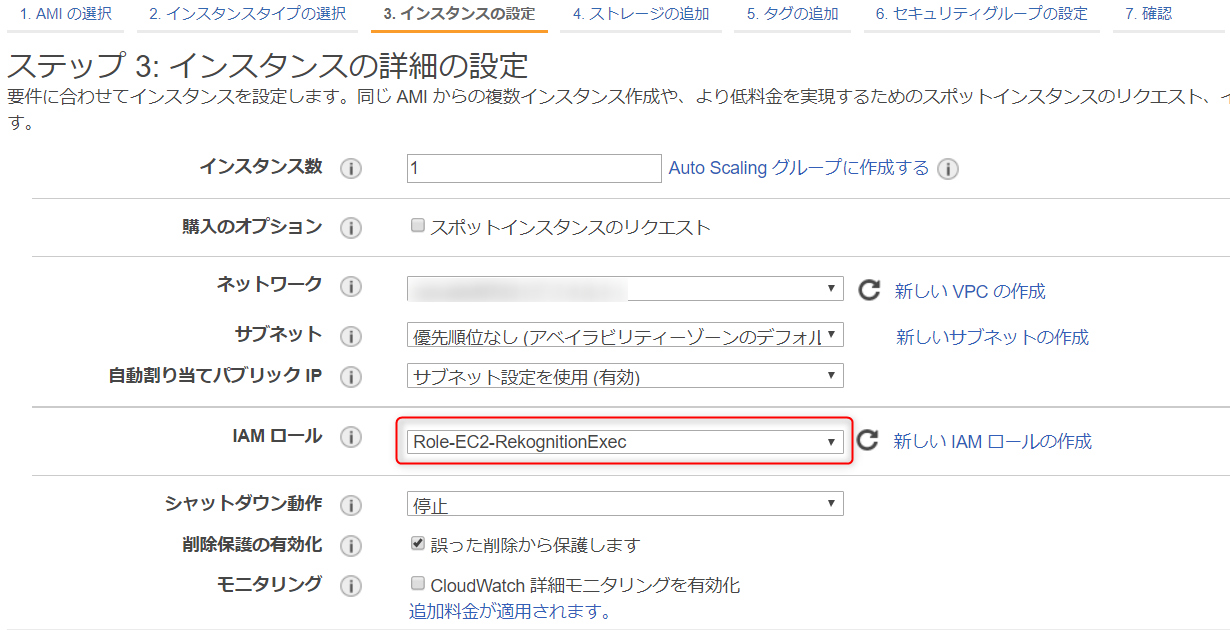
EC2インスタンスを作成して、『IAMロール』として、作成したIAMロールを指定します。
Boto3インストール
Boto3をインストールします。
|
1 |
$ sudo pip install boto3 |
Boto3のインストールを確認します。
|
1 2 |
$ sudo pip list --format=columns | grep boto3 boto3 1.5.28 |
Boto3でRekognition
Boto3でRekognitionのラベル検出を試します。
対象は前回も使用した、2016年の伊勢志摩サミットの写真(出典:G7伊勢志摩サミット公式ホームページ)です。
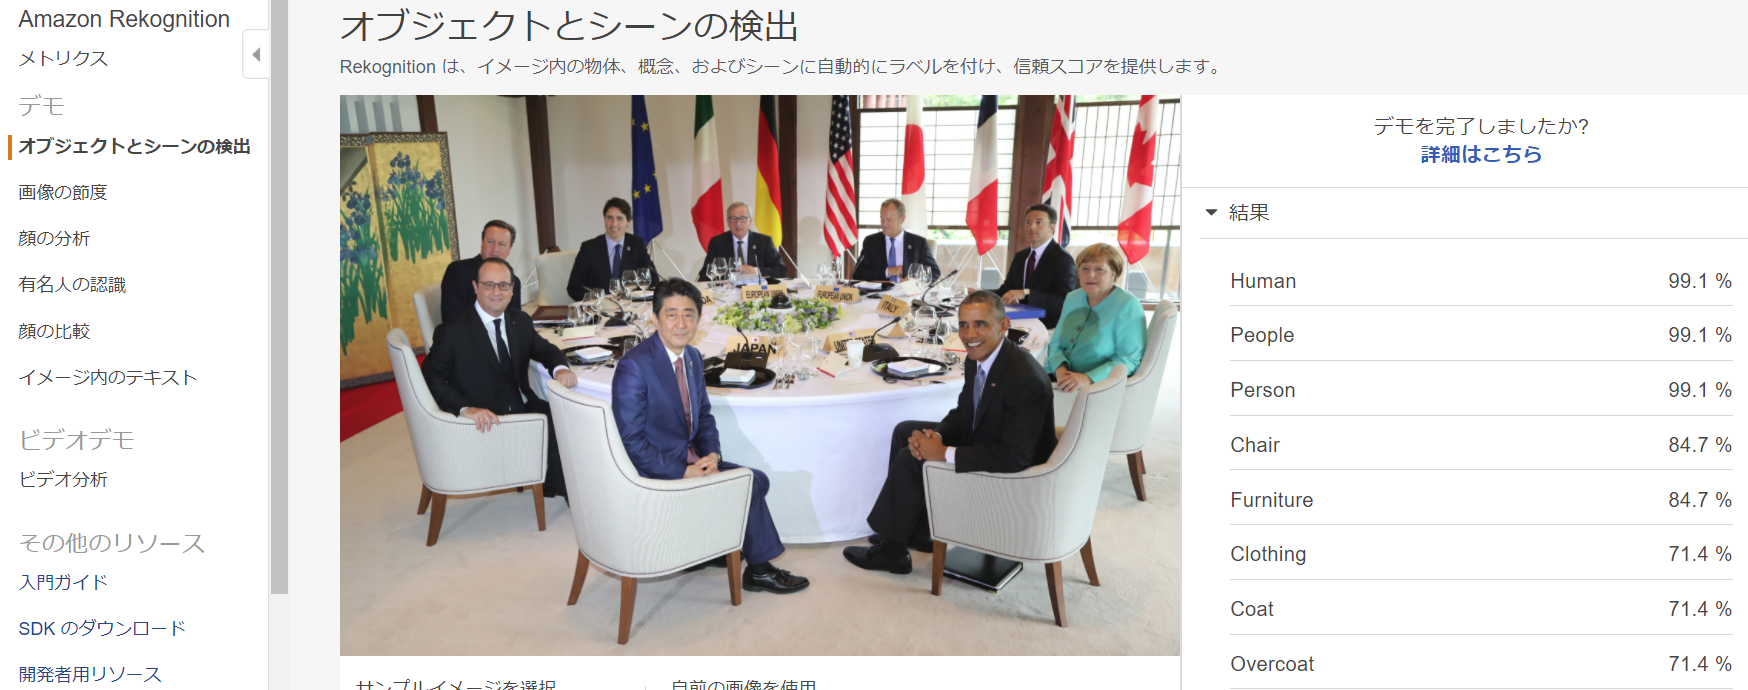
『伊勢志摩サミットの写真』はサーバとS3に事前に格納しておきます。
まずはS3上の画像をRekognitionで認識させてみます。
rekognition_s3.py
|
1 2 3 4 5 6 7 8 9 10 11 12 13 14 15 16 17 |
# -*- coding: utf-8 -*- import sys, boto3 args = sys.argv if __name__ == "__main__": fileName=args[2] bucket=args[1] client=boto3.client('rekognition','us-east-1') response = client.detect_labels(Image={'S3Object':{'Bucket':bucket,'Name':fileName}}) print('Detected labels for ' + fileName) for label in response['Labels']: print (label['Name'] + ' : ' + str(label['Confidence'])) |
『rekognition_s3.py』の第1引数に『S3バケット名』、第2引数に『画像ファイル名』を指定して実行すると、認識結果が返ってきます。JSON形式で返ってきたものを今回は見やすく整形しています。
|
1 2 3 4 5 6 7 8 9 10 11 12 13 14 15 16 17 18 19 20 21 22 23 24 25 26 27 28 29 30 31 32 33 34 35 36 |
$ python rekognition_s3.py your_backet_name G7_Ise-Shima_Summit.jpg Detected labels for G7_Ise-Shima_Summit.jpg Human : 99.1471099854 People : 99.147102356 Person : 99.1471099854 Chair : 84.7735366821 Furniture : 84.7735366821 Clothing : 71.4270324707 Coat : 71.4270324707 Overcoat : 71.4270324707 Suit : 71.4270324707 Home Decor : 71.240737915 Linen : 71.240737915 Tablecloth : 71.240737915 Indoors : 65.379486084 Reception : 65.379486084 Reception Room : 65.379486084 Room : 65.379486084 Waiting Room : 65.379486084 Dining Room : 61.9630813599 Interior Design : 61.9630813599 Dining Table : 60.2814445496 Table : 60.2814445496 Restaurant : 60.0725708008 Tabletop : 58.902507782 Worker : 53.783946991 Bowl : 53.7755661011 Leisure Activities : 53.3260536194 Dinner : 53.1992034912 Food : 53.1992034912 Meal : 53.1992034912 Supper : 53.1992034912 Couch : 51.9016036987 Head : 50.9357643127 Face : 50.6123733521 Portrait : 50.6123733521 |
次にサーバ上にある画像をアップロードしてRekognitionで認識させてみます。
rekognition_ebs.py
|
1 2 3 4 5 6 7 8 9 10 11 12 13 14 15 16 17 18 19 20 21 22 23 |
# -*- coding: utf-8 -*- import sys, boto3 args = sys.argv filename = args[1] #boto3のclient作成、rekognitionとリージョンを指定 client = boto3.client('rekognition','us-east-1') # 画像ファイルを読み込んでバイト列を取得 with open(filename, 'rb') as source_image: source_bytes = source_image.read() # rekognitionのdetect_labelsにバイト列を渡してラベル検出実行 response = client.detect_labels( Image={ 'Bytes': source_bytes } ) # 返ってきたresponseからラベル名(Name)と確度(Confidence)を整形して出力 for label in response['Labels']: print("{Name:30},{Confidence:.2f}%".format(**label)) |
『rekognition_ebs.py』の第1引数に『画像ファイル名』を指定して実行すると、認識結果が返ってきます。JSON形式で返ってきたものを今回は見やすく整形しています。
|
1 2 3 4 5 6 7 8 9 10 11 12 13 14 15 16 17 18 19 20 21 22 23 24 25 26 27 28 29 30 31 32 33 34 35 |
$ python rekognition_ebs.py G7_Ise-Shima_Summit.jpg Human ,99.15% People ,99.15% Person ,99.15% Chair ,84.77% Furniture ,84.77% Clothing ,71.43% Coat ,71.43% Overcoat ,71.43% Suit ,71.43% Home Decor ,71.24% Linen ,71.24% Tablecloth ,71.24% Indoors ,65.38% Reception ,65.38% Reception Room ,65.38% Room ,65.38% Waiting Room ,65.38% Dining Room ,61.96% Interior Design ,61.96% Dining Table ,60.28% Table ,60.28% Restaurant ,60.07% Tabletop ,58.90% Worker ,53.78% Bowl ,53.78% Leisure Activities ,53.33% Dinner ,53.20% Food ,53.20% Meal ,53.20% Supper ,53.20% Couch ,51.90% Head ,50.94% Face ,50.61% Portrait ,50.61% |
関連リンク
Amazon Rekognition の開始方法 ステップ 4: API の使用開始
https://docs.aws.amazon.com/ja_jp/rekognition/latest/dg/get-started-exercise.html
AWS SDK for Python (Boto3)
https://aws.amazon.com/jp/sdk-for-python/
Amazon Rekognitionで画像ファイルのラベル検出(Python boto3で)
https://qiita.com/oyngtmhr/items/40addedffc9b32f377fa
おわりに
以上、EC2インスタンスからAWS SDK for Python (Boto3)でRekognitionを試してみました。
SDKを使うことで画像認識を簡単なコードで実現でき、アプリケーションへの画像認識機能の組み込みが容易に可能です。是非お試し下さい。
最後までお読み頂きありがとうございました。
