こんにちは! JQです。
前回は『OSS編~Fluented & Elasticseach & Kibana パート②~』 ということで、Fluented & ElasticseachとKibanaをインストールして実際にログ解析をしてみました。
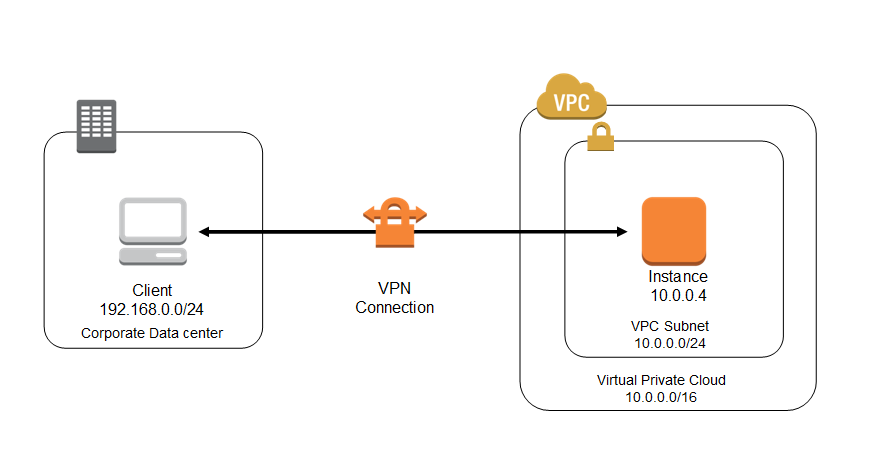
今回は『EC2編~OpenSwan&xl2tpdパート①~』と題して、EC2上でOpenSwan&xl2tpd を利用してL2TP/IPsecを構築してみたいと思います。
それではやってみましょう!
Openswan&xl2tpdのインストール
1. Openswan&xl2tpdのインストール
epelレポジトリを利用してyumコマンドでインストールを行います。
|
1 |
[root@ ~]# sudo yum install --enablerepo=epel openswan xl2tpd |
2.各種設定
IPsecの設定を行います。
virtual_private=で許可するローカルIPを指定します。
また、includeも許可します。
|
1 2 3 4 5 6 7 8 9 10 11 12 13 14 15 16 17 18 19 20 21 22 23 24 25 26 |
[root@ ~]# vim /etc/ipsec.conf # /etc/ipsec.conf - Openswan IPsec configuration file # # Manual: ipsec.conf.5 # # Please place your own config files in /etc/ipsec.d/ ending in .conf version 2.0 # conforms to second version of ipsec.conf specification # basic configuration config setup # Debug-logging controls: "none" for (almost) none, "all" for lots. # klipsdebug=none # plutodebug="control parsing" # For Red Hat Enterprise Linux and Fedora, leave protostack=netkey protostack=netkey nat_traversal=yes virtual_private=%v4:10.0.0.0/8,%v4:192.168.0.0/16,%v4:172.16.0.0/12 oe=off force_keepalive=yes keep_alive=60 # Enable this if you see "failed to find any available worker" # nhelpers=0 #You may put your configuration (.conf) file in the "/etc/ipsec.d/" and uncomment this. include /etc/ipsec.d/*.conf |
leftにインスタンスのローカルIP、leftnexthopにデフォルトゲートウェイを設定します。
|
1 2 3 4 5 6 7 8 9 10 11 12 13 14 15 16 17 18 19 20 21 22 23 24 |
[root@ ~]# vim /etc/ipsec.d/l2tp-psk.conf conn L2TP-PSK-NAT rightsubnet=vhost:%priv also=L2TP-PSK-noNAT conn L2TP-PSK-noNAT authby=secret pfs=no auto=add keyingtries=3 rekey=no ikelifetime=8h keylife=1h type=transport left=[privateip] leftprotoport=17/1701 right=%any rightprotoport=17/0 conn passthrough-for-non-l2tp type=passthrough left=[privateip] leftnexthop=[defaultgateway] right=0.0.0.0 rightsubnet=0.0.0.0/0 auto=route |
事前共有鍵の設定をします。
|
1 2 |
[root@ ~]# vim /etc/ipsec.d/ipsec.secrets %any: PSK "password" |
xl2tpdの設定を行います。
ip range にはリースするIPを記載します。
|
1 2 3 4 5 6 7 8 9 10 11 12 13 14 15 16 17 18 19 20 21 22 23 24 25 26 27 28 29 30 31 32 33 34 35 36 37 38 39 40 41 42 43 44 45 46 47 |
[root@ ~]# cat /etc/xl2tpd/xl2tpd.conf ; ; This is a minimal sample xl2tpd configuration file for use ; with L2TP over IPsec. ; ; The idea is to provide an L2TP daemon to which remote Windows L2TP/IPsec ; clients connect. In this example, the internal (protected) network ; is 192.168.1.0/24. A special IP range within this network is reserved ; for the remote clients: 192.168.1.128/25 ; (i.e. 192.168.1.128 ... 192.168.1.254) ; ; The listen-addr parameter can be used if you want to bind the L2TP daemon ; to a specific IP address instead of to all interfaces. For instance, ; you could bind it to the interface of the internal LAN (e.g. 192.168.1.98 ; in the example below). Yet another IP address (local ip, e.g. 192.168.1.99) ; will be used by xl2tpd as its address on pppX interfaces. ; IMPORTANT: always set listen-addr to a specific address, to work around a ; udpfromto bug!!! [global] ipsec saref = yes ; listen-addr = 192.168.1.98 ; ; requires openswan-2.5.18 or higher - Also does not yet work in combination ; with kernel mode l2tp as present in linux 2.6.23+ ; ipsec saref = yes ; Use refinfo of 22 if using an SAref kernel patch based on openswan 2.6.35 or ; when using any of the SAref kernel patches for kernels up to 2.6.35. ; ipsec refinfo = 30 ; ; force userspace = yes ; ; debug tunnel = yes [lns default] ip range = xxx.xxx.xxx.xxx-xxx.xxx.xxx.yyy local ip = [privateip] ; leave chap unspecified for maximum compatibility with windows, iOS, etc ; require chap = yes refuse pap = yes require authentication = yes name = LinuxVPNserver ppp debug = yes pppoptfile = /etc/ppp/options.xl2tpd length bit = yes |
ログ設定やDNS設定を記載します。
|
1 2 3 4 5 6 7 8 9 10 11 12 13 14 15 16 17 18 19 20 21 22 23 24 25 26 27 28 29 30 31 32 33 |
[root@ ~]# vim /etc/ppp/options.xl2tpd ipcp-accept-local ipcp-accept-remote ms-dns 8.8.8.8 # ms-dns 192.168.1.1 # ms-dns 192.168.1.3 # ms-wins 192.168.1.2 # ms-wins 192.168.1.4 noccp auth crtscts idle 1800 mtu 1410 mru 1410 nodefaultroute debug lock proxyarp connect-delay 5000 refuse-pap refuse-chap refuse-mschap require-mschap-v2 logfile /var/log/xl2tpd.l2tp-ipsec.log # To allow authentication against a Windows domain EXAMPLE, and require the # user to be in a group "VPN Users". Requires the samba-winbind package # require-mschap-v2 # plugin winbind.so # ntlm_auth-helper '/usr/bin/ntlm_auth --helper-protocol=ntlm-server-1 --require-membership-of="EXAMPLE\\VPN Users"' # You need to join the domain on the server, for example using samba: # http://rootmanager.com/ubuntu-ipsec-l2tp-windows-domain-auth/setting-up-openswan-xl2tpd-with-native-windows-clients-lucid.html |
ユーザーとパスワードを設定します。
|
1 2 3 4 |
[root@ ~]# vim /etc/ppp/chap-secrets # Secrets for authentication using CHAP # client server secret IP addresses user * password * |
サービスを再起動して設定を反映させます。
|
1 2 3 4 |
[root@ ~]# /etc/rc.d/init.d/ipsec start ipsec_setup: Starting Openswan IPsec U2.6.37/K3.4.62-53.42.amzn1.x86_64... [root@ ~]# /etc/rc.d/init.d/xl2tpd start Starting xl2tpd: [ OK ] |
3.SecurityGroupの開放
SecurityGroupで以下ポートを開放します。
500:udp
4500:udp
1701:udp
今回はここまでとなります。
いかがでしたでしょうか?
次回は『EC2編~OpenSwan&xl2tpdパート②~』ということで、Windowsの標準クライアントを利用して実際にVPNで接続してみたいと思います。
お楽しみに!
——————————————————————————————————
ナレコムクラウドのFacebookに『いいね!』をクリックして頂くと
最新のお役立ちレシピが配信されます★
┏━━━━━━━━━━━━━┓
┃ナレコムクラウド Facebook┃
┗━━━━━━━━━━━━━┛
——————————————————————————————————

