はじめに
AWS LambdaがVPC内リソースへのアクセスが出来るようになりました。
この機能によりセキュアにAWS Lambdaを利用する事が出来るようになり、VPC内にあるRDSやElastiCacheなどとの連携が考えられますね!
今回はAWS LambdaをVPCにあるElastiCacheへ接続を試してみたいと思います。
RDSの記事を参照したい方は、こちらから!
AWS Lambda編~VPCにあるRDSへ接続を試してみる~
本記事の概要
- AWS LambdaをVPCにあるElastiCacheへ接続するハンズオンを行います
- ゴールはLambda 関数でUUID を生成し、ElastiCache クラスターに UUID を書き込むまでとします
- AWSのほかにpipを使用します
ハンズオン
1. ElastiCacheの準備
VPC内にElastiCacheを立ち上げておきます。
2.Lambdaの作成
次にLambdaをElastiCacheに接続するためにデプロイパッケージで作成します。
今回はAWSのサンプルを利用します。
http://docs.aws.amazon.com
|
1 2 3 4 5 6 7 8 9 10 11 12 13 14 15 16 17 18 19 20 21 22 23 24 25 26 27 28 29 30 31 32 33 34 |
from __future__ import print_function import time import uuid import sys import socket import elasticache_auto_discovery from pymemcache.client.hash import HashClient #elasticache settings elasticache_config_endpoint = "your-elasticache-cluster-endpoint:port" nodes = elasticache_auto_discovery.discover(elasticache_config_endpoint) nodes = map(lambda x: (x[1], int(x[2])), nodes) memcache_client = HashClient(nodes) def handler(event, context): """ This function puts into memcache and get from it. Memcache is hosted using elasticache """ #Create a random UUID... this will the sample element we add to the cache. uuid_inserted = uuid.uuid4().hex #Put the UUID to the cache. memcache_client.set('uuid', uuid_inserted) #Get item (UUID) from the cache. uuid_obtained = memcache_client.get('uuid') if uuid_obtained == uuid_inserted: # this print should go to the CloudWatch Logs and Lambda console. print("Success: Fetched value %s from memcache" % (uuid_inserted)) else: raise Exception("Value is not the same as we put :(. Expected %s got %s" %(uuid_inserted, uuid_obtained)) return "Fetched value from memcache: " + uuid_obtained |
続いて以下の依存ライブラリをpipでインストールします。
・pymemcache
・elasticache-auto-discovery
|
1 2 3 4 |
$ pip install pymemcache -t ./ $ pip install elasticache-auto-discovery -t ./ $ zip –r app.zip * |
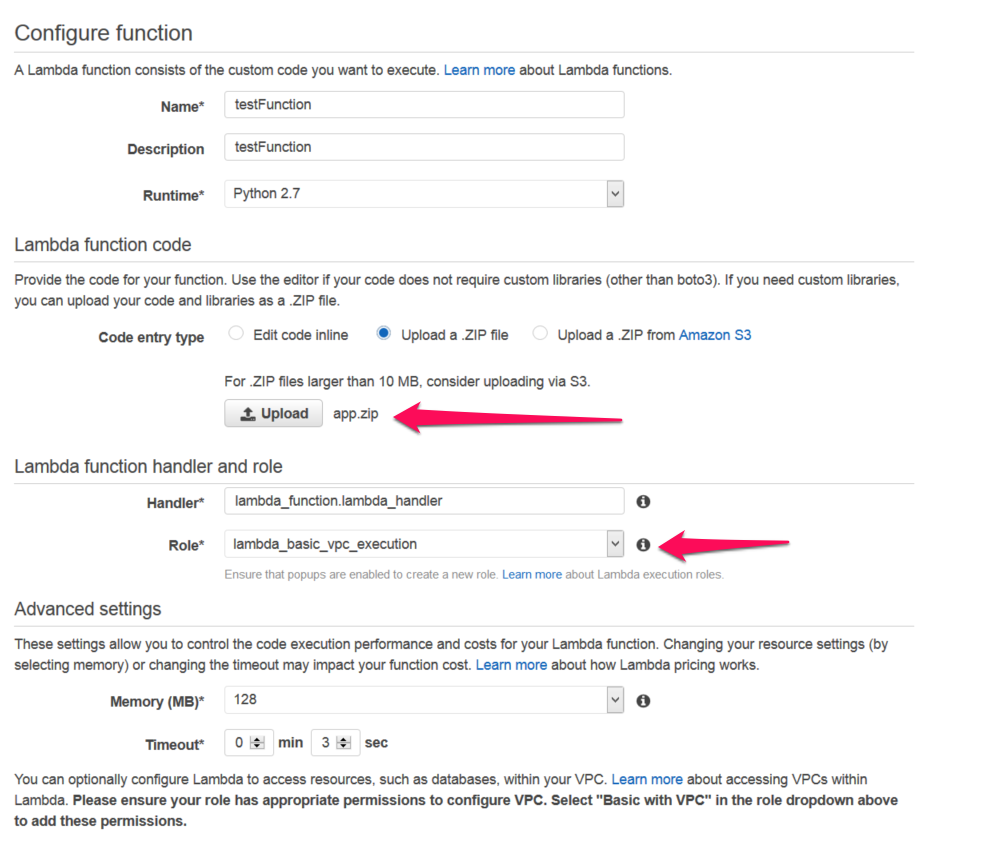
Lambda Functionを作成します。
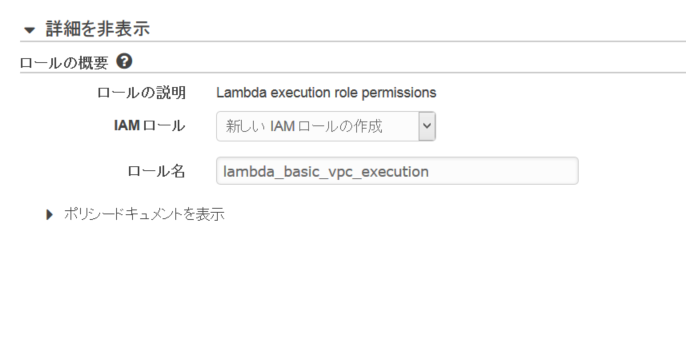
その際にIAM Role をlambda_basic_vpc_executionで作成します。
先ほど作成したapp.zipをアップロードして設定します。
Handler はapp.handlerを設定します。
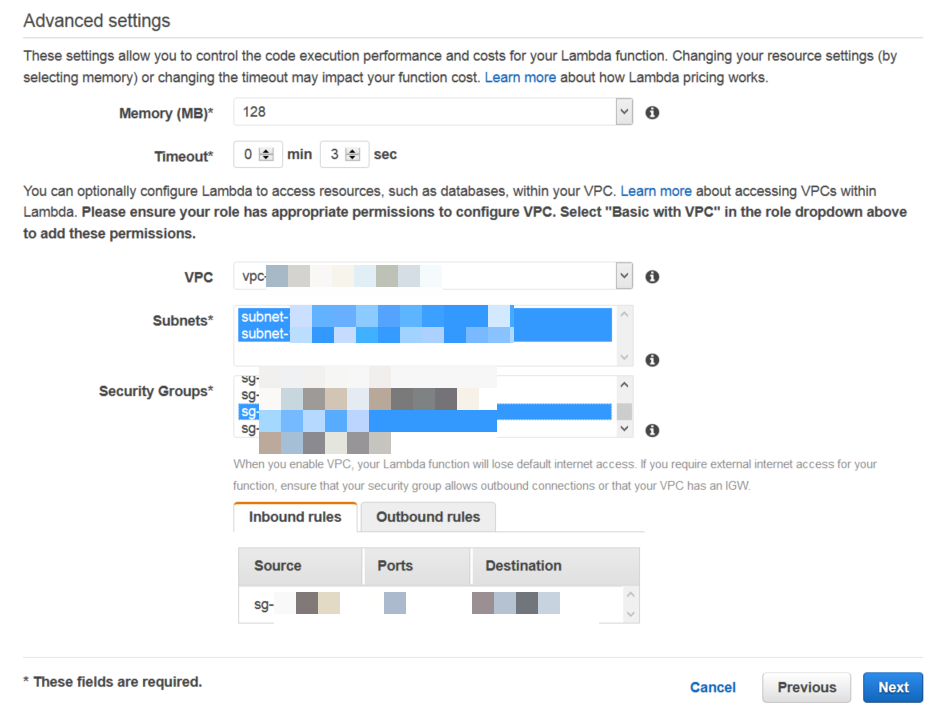
VPCで実行するように設定を行います。
3.確認してみる
invokeコマンドを手動で実行して確認してみます。
今回のサンプルでは実行された Lambda 関数は UUID を生成し、Lambda コードで指定された ElastiCache クラスターに、その UUID を書き込みます。次に、Lambda 関数はキャッシュから項目を取得します。
|
1 2 3 4 5 6 7 |
$ aws lambda invoke --function-name testFunction --region us-east-1 --profile profile_name output.txt { "StatusCode": 200 } $ cat output.txt "Fetched value from memcache: d823df2d797047f991b804524c012012 |
おわりに
今回はAWS LambdaをVPC内のElastiCacheへの接続のハンズオンを行いました。
作業数はそれほど多くの無いので、サクッと終わらせることが出来ました。
本記事とはずれてしまいますが、LambdaとElastiCachにSNSを挟むことでフェイルオーバや再起動が発生した場合もメール等で通知を行うことができるようです。
次回もお楽しみに!!!


