こんにちは、ナレコム前川です。
今回は、 Amazon Sumerian のチュートリアルの Streaming Video Using an Interactive TV
を進めていきたいと思います。
はじめに
ここでは、
・State Machine について
・HTML コンポーネントについて
を学んでいきます。
1.シーンを開く
まず、AWS にログインし、Sumerian を起動してください。
次に、前回作成した TV Room のシーンを開きます。
2.TV にビデオを追加する
ここでは、シーンで配置した TV で Youtube の動画が見れるように設定していきます。
設定するためには、HTML 3D コンポーネントを追加する必要があるので
それらの操作をこれから行なっていきます。
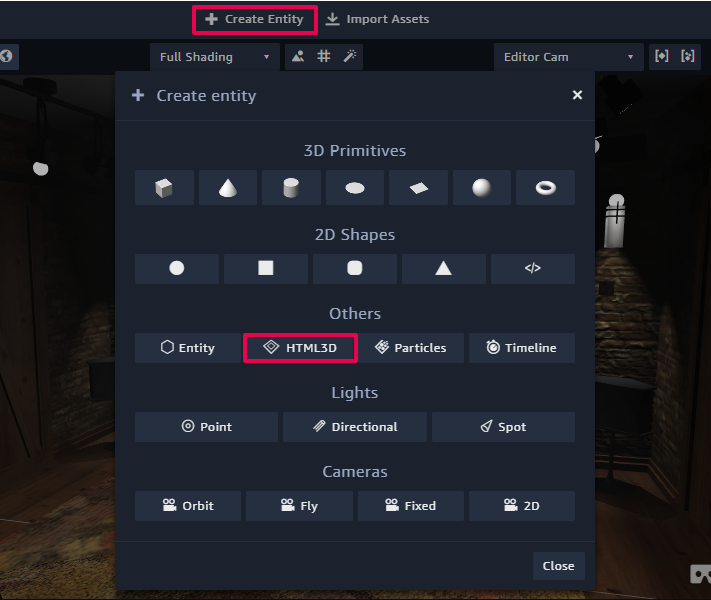
① [Create Entity] をクリック
② [Others] カテゴリから 「HTML 3D」を選択
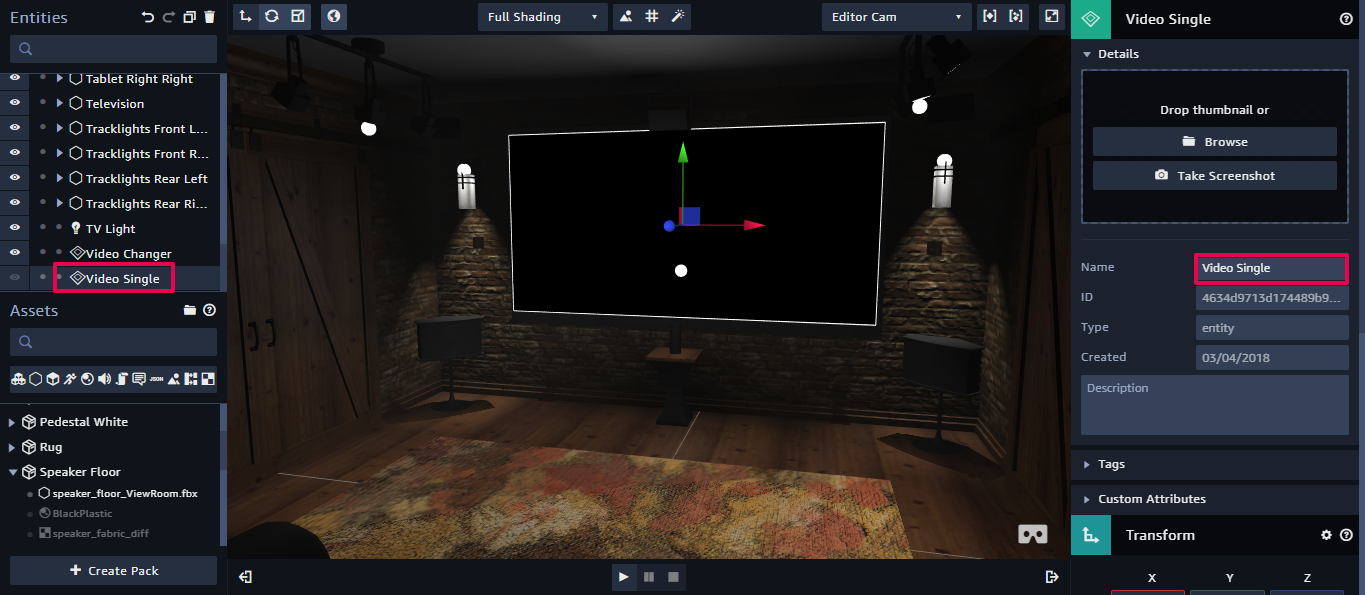
③ [Inspector] パネルから 「Video Single」に名前を変更
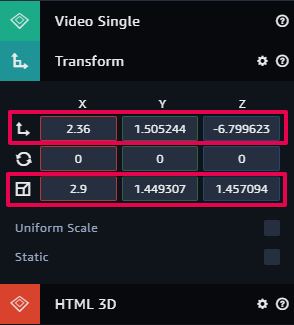
④ [Transform] から位置を(2.36,1.505244,-6.799623)、大きさを(2.9,1.449307,1.457094) に設定
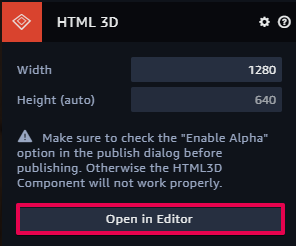
⑤ [HTML 3D] を展開し、[Open in Editor] を開く
⑥もともと記載されているプログラムを以下に書き換える
|
1 2 3 |
<iframe width="560" height="315" src="https://www.youtube.com/embed/ZDScBNahsL4"frameborder="0" allowfullscreen></iframe> |
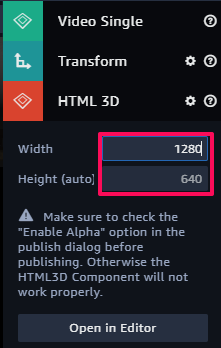
⑦[HTML3D] コンポーネント内から [Width] を 1280 に変更してください。
[Height] は、自動的に 640 に変わります。
⑧それでは、再び HTML editor に戻って、コード内の [width] と [height] の値を
1280 と 720 に変更します。
|
1 2 3 |
<iframe width="1280" height="720" src="https://www.youtube.com/embed/ZDScBNahsL4"frameborder="0" allowfullscreen></iframe> |
※別の動画を使用したい場合は、共有設定から埋め込みコードを取得してURL を置き換えてください。
⑨設定完了後、キャンバスの下にある再生ボタンを押して、実行してみてください。
TV をクリックすると動画が再生されます。
チャンネル切り替えができるTVの構築
これまでの作業によって、TVで1つの動画が見れるようになりました。
ここでは、前回配置した [Amazon Echo] をクリックすることで
チャンネル切り替えができるような機能を作成していきます。
3.HTML 3D を追加する
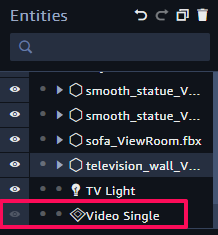
①[Video Single] エンティティを非表示にする。
これは、[Video Single] エンティティが操作の妨げにならないようにするためです。
非表示にするためには、[Entities] パネルから非表示にしたいエンティティの横にある目のアイコンをクリックします。
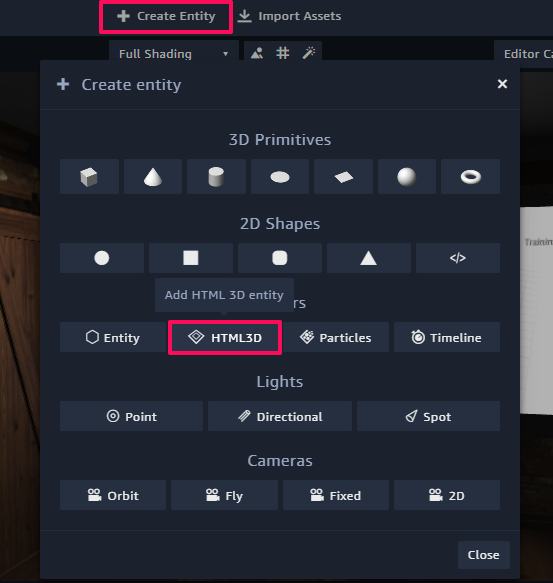
②[Create Entity] をクリック。
③[Others] カテゴリの「HTML 3D」 を選択して追加する。
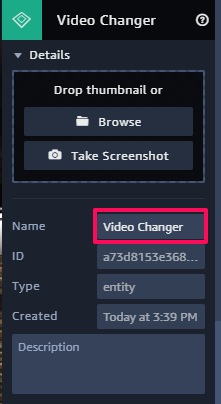
④名前を「Video Changer」に変更。
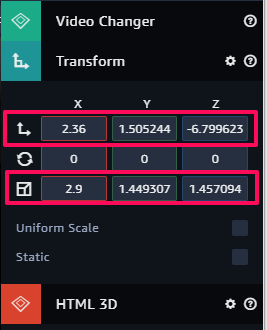
⑤ [Inspector] パネルで [Transform] を以下のように編集する。
位置を(2.36,1.505244,-6.799623)、大きさを(2.9,1.449307,1.457094)
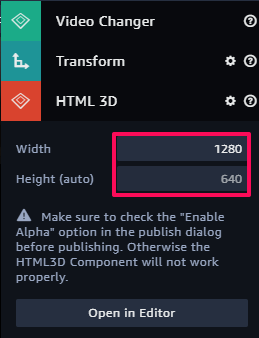
⑥ [HTML 3D] コンポーネントから [width] を 1280 に変更。
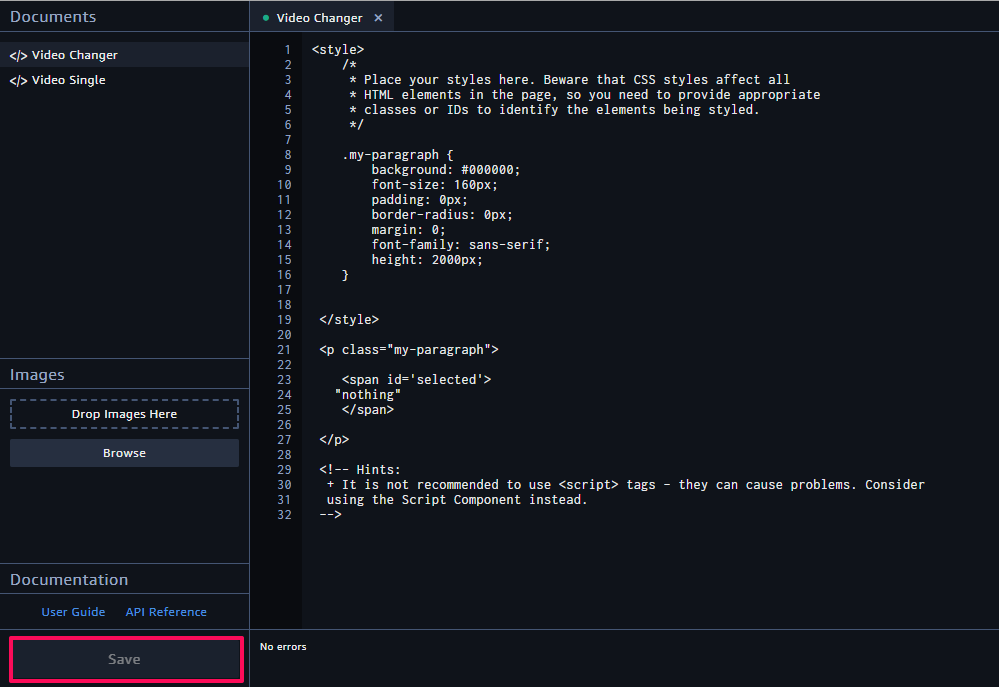
⑦ [Open in Editor] から HTML editor を開いて、以下のプログラムと置き換える。
|
1 2 3 4 5 6 7 8 9 10 11 12 13 14 15 16 17 18 19 20 21 22 23 24 25 26 27 28 29 30 31 32 33 34 |
<style> /* * Place your styles here. Beware that CSS styles affect all * HTML elements in the page, so you need to provide appropriate * classes or IDs to identify the elements being styled. */ .my-paragraph { background: #000000; font-size: 160px; padding: 0px; border-radius: 0px; margin: 0; font-family: sans-serif; height: 2000px; } </style> <p class="my-paragraph"> <span id='selected'> "nothing" </span> </p> <!-- Hints: + It is not recommended to use <script> tags - they can cause problems. Consider using the Script Component instead. --> |
※ HTML editor を閉じる前に Save をクリックしてください。
4.スクリプトを追加する
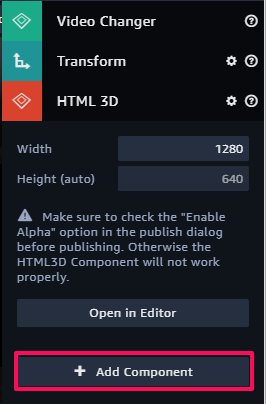
① [Entities] パネルから [Video Changer] をクリックして
[Inspector] パネルから [Add Component] を選択。
② [Script] を選択。
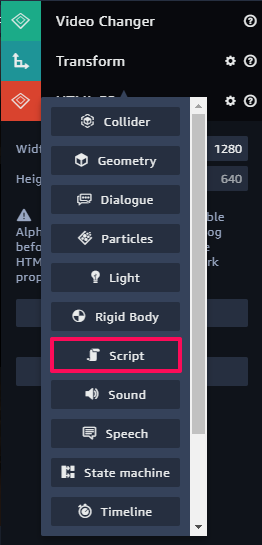
③+ボタンをクリックしてCustom を選択。
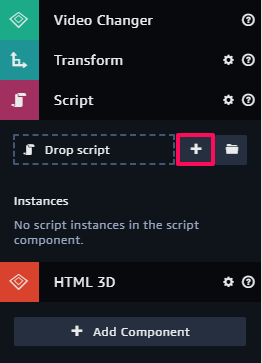
④追加されたスクリプトのペンシルボタンをクリック。
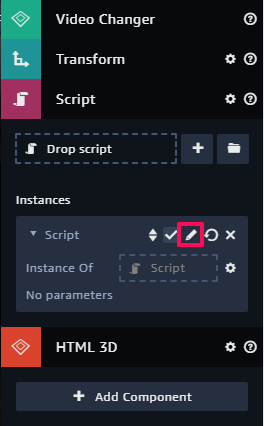
⑤以下のプログラムと書き換える。
|
1 2 3 4 5 6 7 8 9 10 11 12 13 14 15 16 17 18 19 20 21 22 23 24 25 26 27 28 29 30 31 32 33 34 35 36 37 38 39 |
'use strict'; var SystemBus = sumerian.SystemBus; var spanElement; var videoStreams = [ ' <iframe width="1280" height="720" src="https://www.youtube.com/embed/zzayf9GpXCI" frameborder="0" allowfullscreen></iframe>', '<iframe width="1280" height="720" src="https://www.youtube.com/embed/ZDScBNahsL4" frameborder="0" allowfullscreen></iframe>', '<iframe width="1280" height="720" src="https://www.youtube.com/embed/mZ5H8sn_2ZI?&rel=0&controls=0&showinfo=0" frameborder="0" allowfullscreen></iframe>', '<iframe width="1280" height="720" src="https://www.youtube.com/embed/?autoplay=1listType=playlist&list=PLlZmMlO-eGmW9n6Rk6WVUSZKWJ1P6br80" frameborder="0" allowfullscreen>' ]; var currentStream = 0; var setup = function (args, ctx, sumerian) { SystemBus.addListener('nextStream', next); spanElement = document.getElementById('selected'); spanElement.innerHTML = videoStreams[currentStream]; //console.log(videoStreams.length); }; function next() { currentStream = currentStream + 1; // if (currentStream > videoStreams.length -1) { currentStream = 0; } spanElement.innerHTML = videoStreams[currentStream]; }; var fixedUpdate = function (args, ctx) { // Called on every physics update, after setup(). }; var update = function (args, ctx) { // Called on every render frame, after setup(). }; var lateUpdate = function (args, ctx) { // Called after all script "update" methods in the scene has been called. }; var cleanup = function (args, ctx) { SystemBus.removeListener('nextStream', next); }; var parameters = []; |
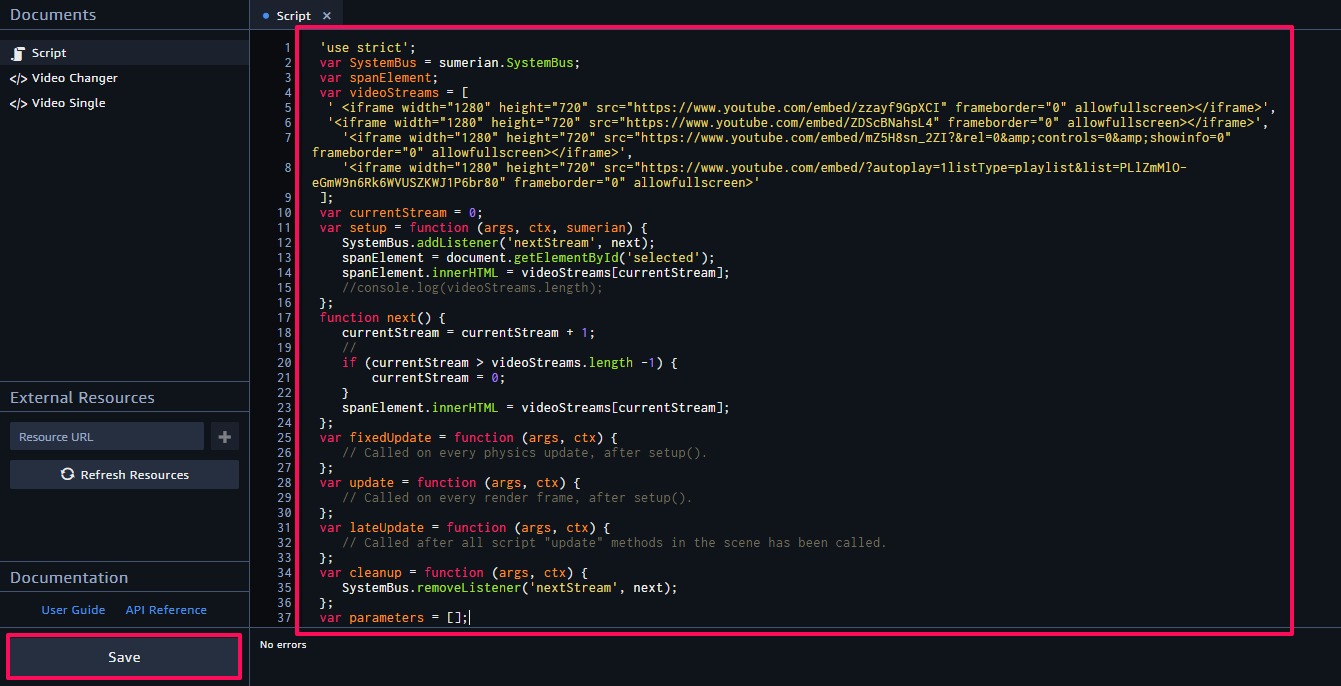
ここでは、チャンネルが変更できるように設定を行っています。
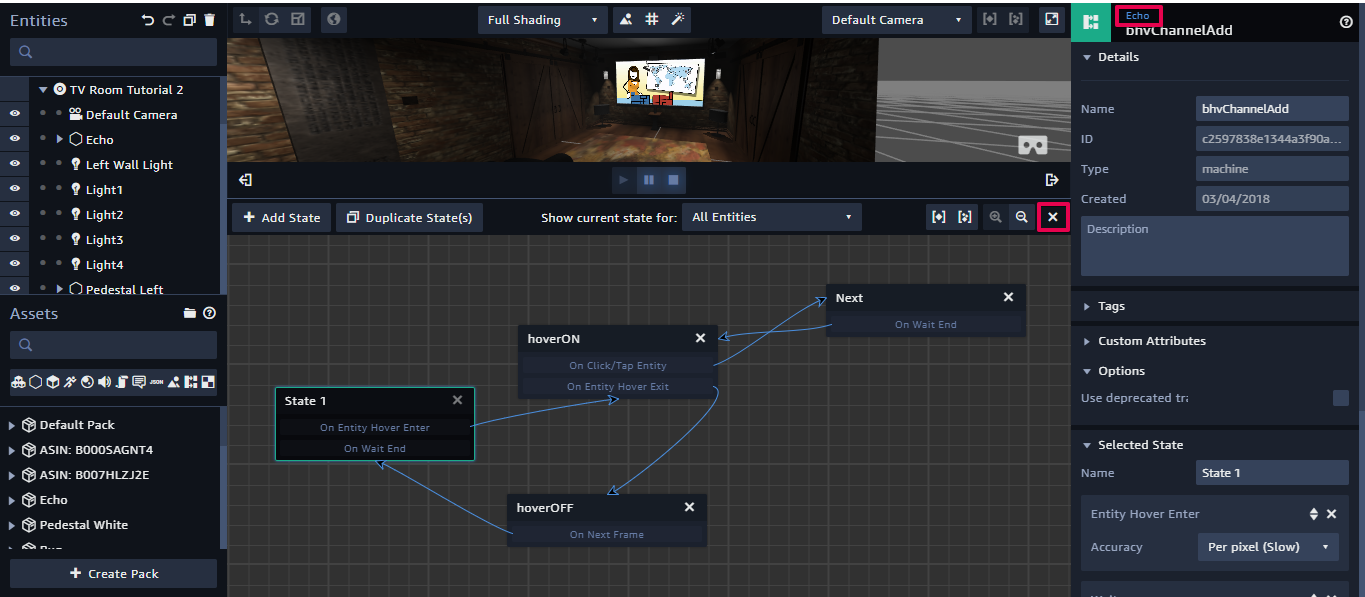
5.ステートマシンを追加する
まず、[Entities] パネルで Echo を選択してください。
次に、[Inspector] パネルから [Add Component] をクリックし、
[State Machine] を追加してください。
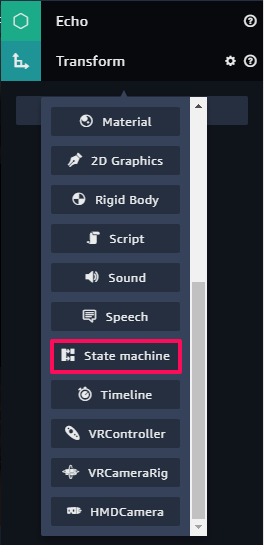
追加したら、[State Machine] コンポーネントの+ボタンをクリックします。
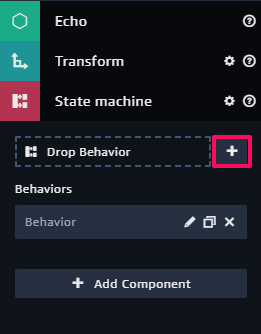
クリックすると、[Inspector] パネルに Behavior が表示され、
キャンバスの下にグラフが表示されます。
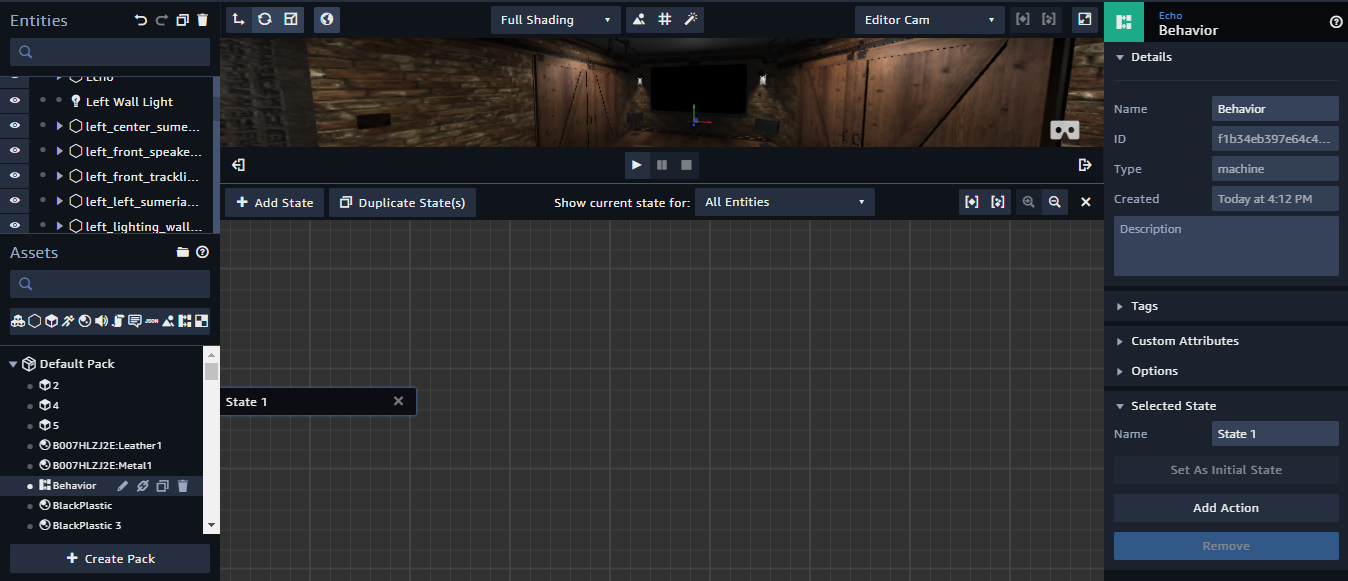
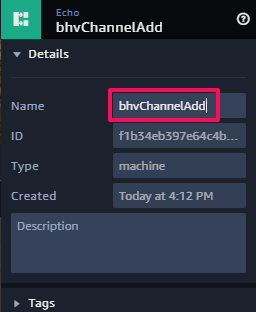
[Inspector] パネルから名前を bhvChannelAdd に変更してください。
State1
すでに追加されている [State1] を選択し、Add Action をクリックします。
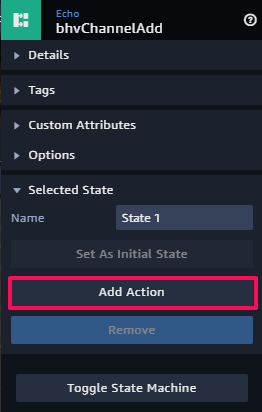
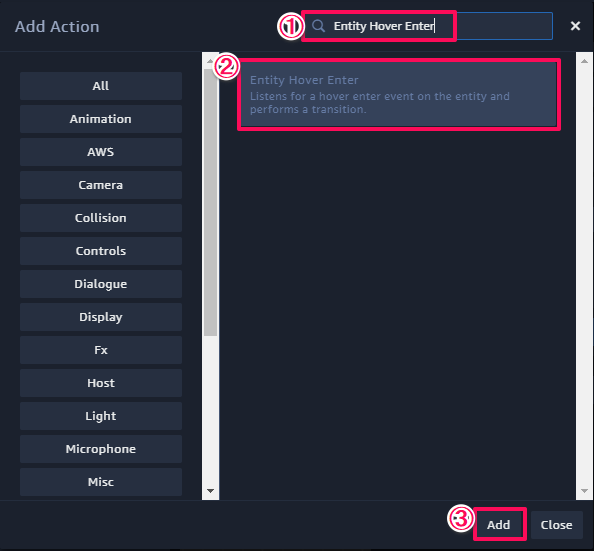
クリックしたら「Entity Hover Enter」を検索し、追加してください。
[Inspector] パネルから [Accuracy] を Per pixel(Slow) に変更します。
次に、再度 Add Action から「Wait」を追加し、
[Time] が 5000 になっていることを確認してください。
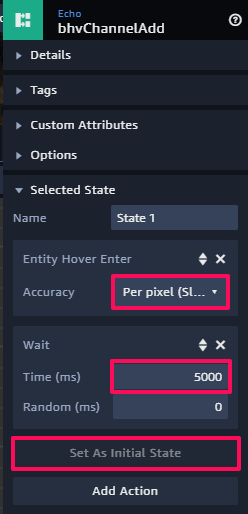
確認したら「Set As Initial State」になっていることも確認します。
※ボタンがクリックできなければ設定されているということです。
State2
まず、キャンバス下のグラフの左上にある Add State をクリックし、
State2 を追加します。
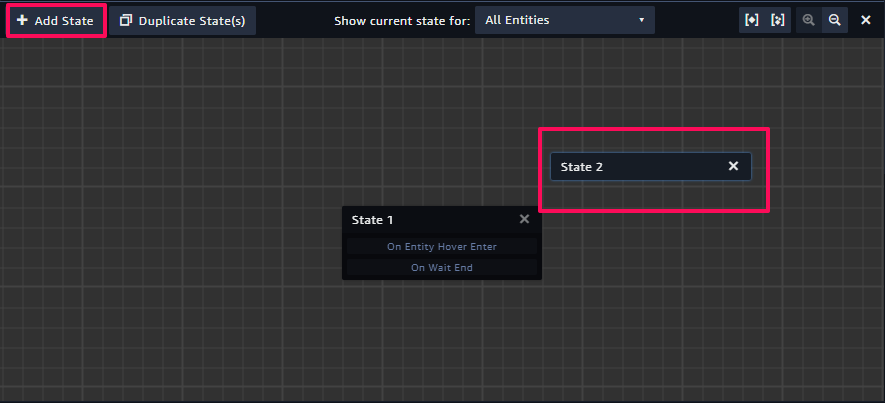
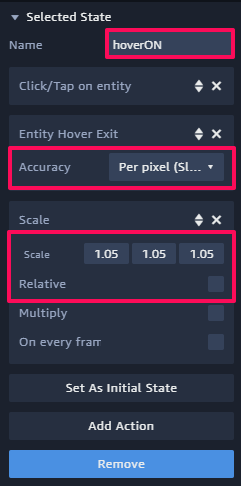
次に、[Inspector] パネルから名前を「hoverON」に変更し、
以下の3つのアクションを追加します。
- Click/Tap on entity
- Entity Hover Exit
- Scale
追加したら、[Accuracy] を Per pixel(Slow) 、
Scale X,Y,Z を (1.05,1.05,1.05)に変更し、
Relative のチェックを外してください。
State3
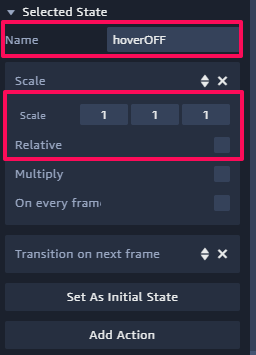
同様の方法で「State3」を追加してください。
名前を「hoverOFF」に変更し、以下の2つのアクションを追加します。
- Scale
- Transition on next frame
追加したら Scale X,Y,Z を (1,1,1)に変更し、
Relative のチェックを外してください。
State4
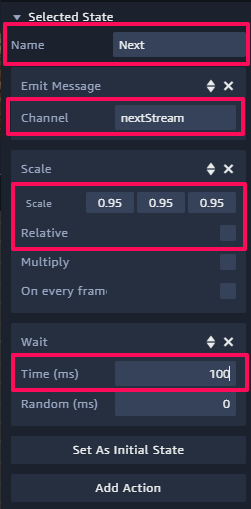
再度同様の方法で「State4」を追加します。
名前を「Next」に変更し、以下の3つのアクションを追加します。
- Emit Message
- Scale
- Wait
- Channel に「nextStream」と入力
- Scale X,Y,Z を (0.95,0.95,0.95) に変更
- Relative のチェックを外す
- Time(ms) を 100 に変更
最後に、グラフ上のステートを矢印で繋げていきます。
矢印を繋げる際には、ステート名の下に表示されている機能をクリックし、
ホールドしたまま、繋げたいステートに矢印を伸ばしてください。
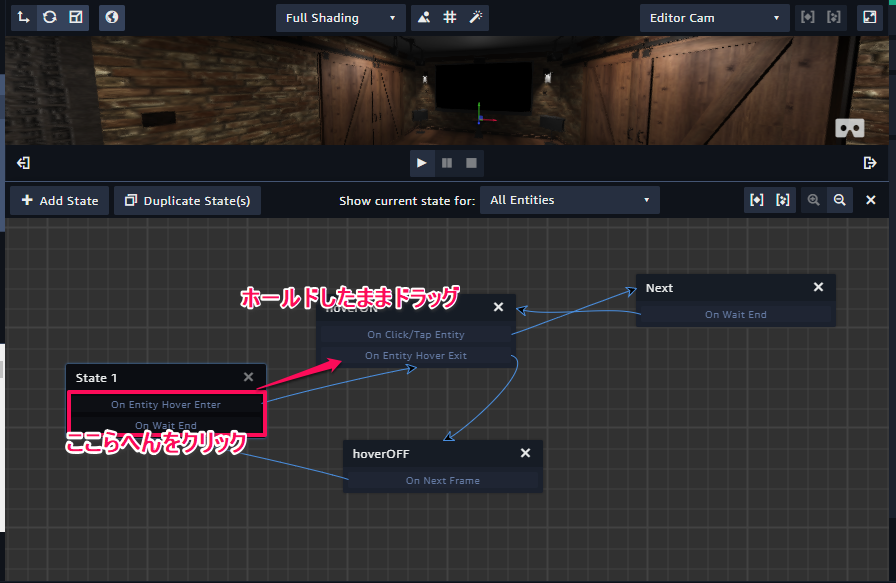
※私が最初操作した時は、全く方法がわかりませんでした。。。
操作が終わったらグラフを消して、[Inspector] パネルの一番上にある
Echo のリンクをクリックして終了してください。
それでは、キャンバスの再生ボタンをクリックし、実行してみてください。
実行後、スクリーンをクリックすると動画が再生されます。
また、Echo をクリックするとチャンネルが切り替わります。
これで今回は以上です。
お疲れ様でした。
