こんにちは、ナレコム前川です。
今回は、Amazon Sumerian の公式チュートリアルの
Positioning Static HTML を進めていきたいと思います。
ここで学ぶことは、静的なHTML要素を配置する方法についてです。
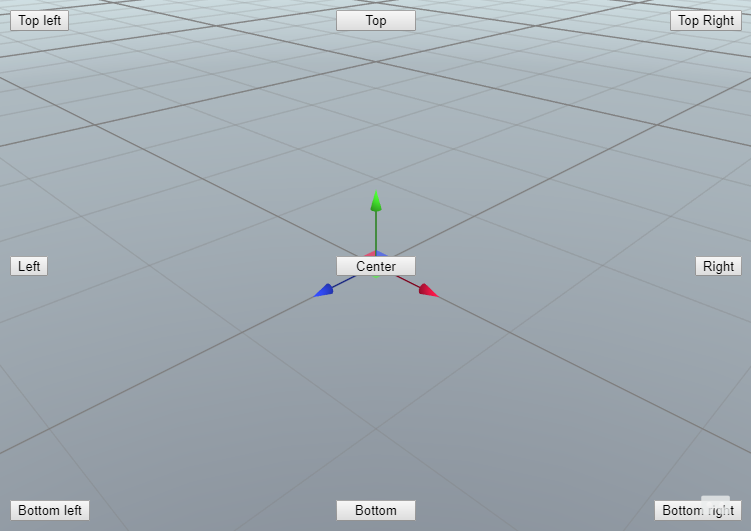
クリック可能な HTML要素を含むボタンをフレームビューの端に配置し、「上、左、右、下」などと表示していきます。
それでは、進めていきましょう。
1. シーン作成
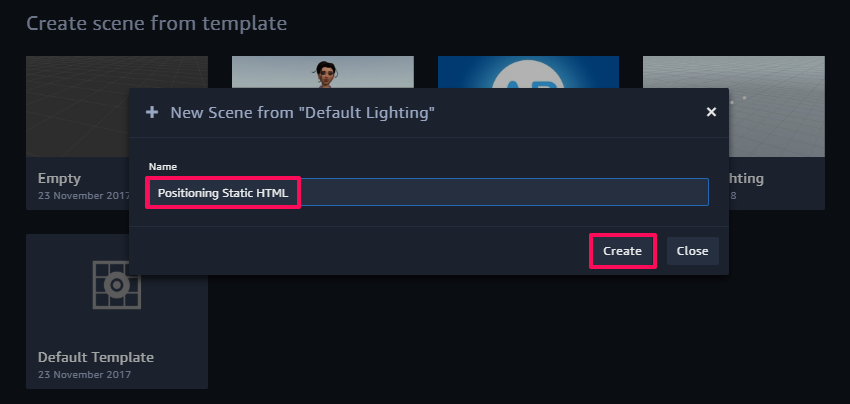
① ダッシュボードからDefault Lighting を選択。
② シーン名を「Positioning Static HTML」にし、作成。

シーンが正常に開いたら、作成完了です。
2. HTML の追加と編集
ここでは、スクリプトを追加し、編集していきます。
① Create Entity から HTML</> を選択、追加。

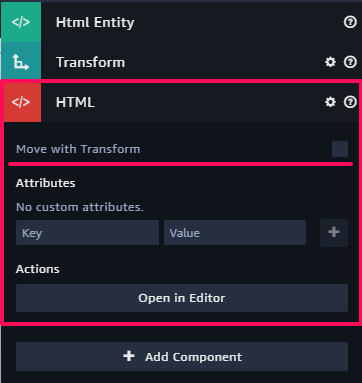
② Inspector パネルから HTML を展開。
③ Move with Transform のチェックを外す。

※HTMLエンティティのコード内でボタンを画面の辺に合わせるには、
各ボタンのCSSスタイルと位置を設定する必要があります。
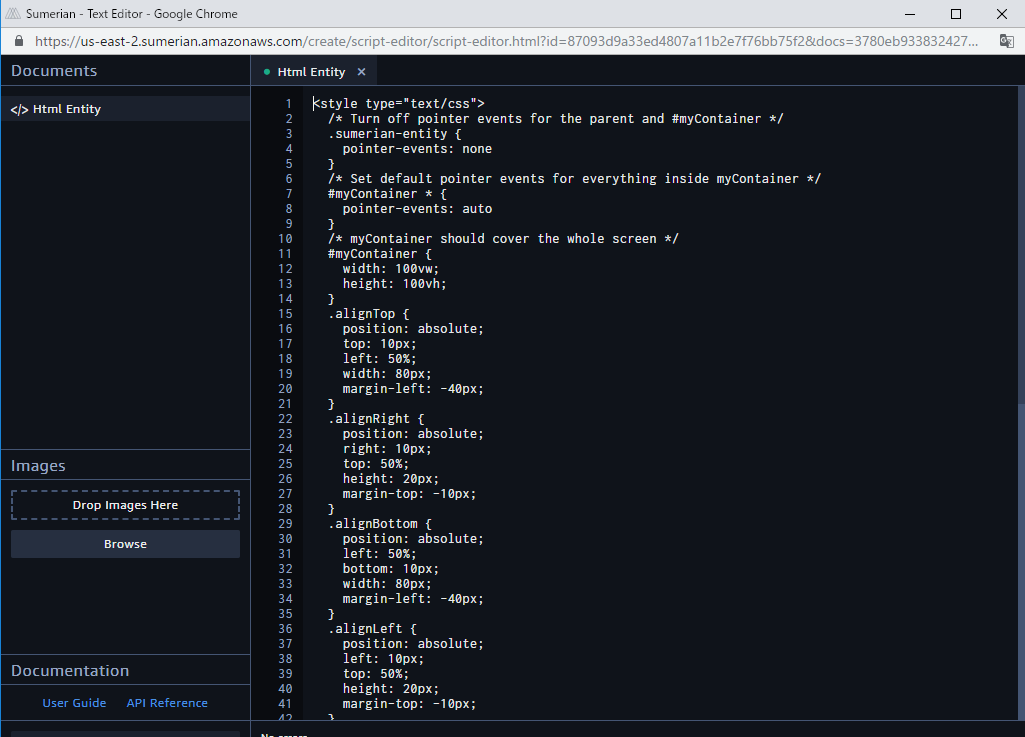
④ Open in Editor を選択。
⑤ 以下のコードと置き換える。
|
1 2 3 4 5 6 7 8 9 10 11 12 13 14 15 16 17 18 19 20 21 22 23 24 25 26 27 28 29 30 31 32 33 34 35 36 37 38 39 40 41 42 43 44 45 46 47 48 49 50 51 52 53 54 55 56 57 58 59 60 61 62 63 64 65 66 67 68 69 70 71 72 73 74 75 76 77 78 79 80 81 82 83 |
<style type="text/css"> /* Turn off pointer events for the parent and #myContainer */ .sumerian-entity { pointer-events: none } /* Set default pointer events for everything inside myContainer */ #myContainer * { pointer-events: auto } /* myContainer should cover the whole screen */ #myContainer { width: 100vw; height: 100vh; } .alignTop { position: absolute; top: 10px; left: 50%; width: 80px; margin-left: -40px; } .alignRight { position: absolute; right: 10px; top: 50%; height: 20px; margin-top: -10px; } .alignBottom { position: absolute; left: 50%; bottom: 10px; width: 80px; margin-left: -40px; } .alignLeft { position: absolute; left: 10px; top: 50%; height: 20px; margin-top: -10px; } .alignBottomRight { position: absolute; right: 10px; bottom: 10px; } .alignBottomLeft { position: absolute; left: 10px; bottom: 10px; } .alignTopLeft { position: absolute; left: 10px; top: 10px; } .alignTopRight { position: absolute; right: 10px; top: 10px; } .alignCenter { position: absolute; top: 50%; left: 50%; height: 20px; width:80px; margin-top: -10px; margin-left: -40px; } </style> <div id="myContainer"> <button class='alignTop'>Top</button> <button class='alignRight'>Right</button> <button class='alignBottom'>Bottom</button> <button class='alignLeft'>Left</button> <button class='alignBottomRight'>Bottom right</button> <button class='alignBottomLeft'>Bottom left</button> <button class='alignTopLeft'>Top left</button> <button class='alignTopRight'>Top Right</button> <button class='alignCenter'>Center</button> </div> |

CSS ファイルでは、ボタン配置の位置についてのクラスを9つ作っています。
次に、それぞれのボタンを配置しています。
シーンに戻ると、9つのボタンが配置されていると思います。

シーンを実行してボタンが押せるかどうか確認してください。
今回のチュートリアルは以上です。
お疲れ様でした。
