こんにちは、ナレコム前川です。
今回は、Amazon Sumerian の公式チュートリアルの Custom Shader を進めていきたいと思います。
ここで学ぶことは
・Custom Shader について
・Material について
・Scripting について
の3つです。
それでは、進めていきましょう。
1. シーンの作成
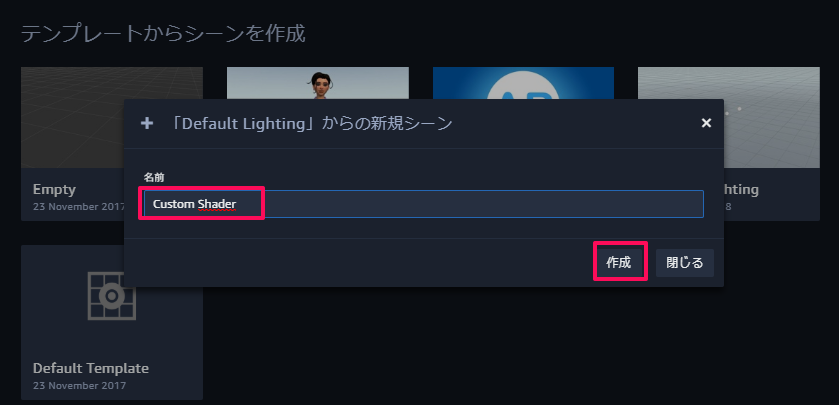
① ダッシュボードからDefault Lightingを選択。
② シーン名を「Custom Shader」に設定し、作成。
③ Create Entity から Box を追加。
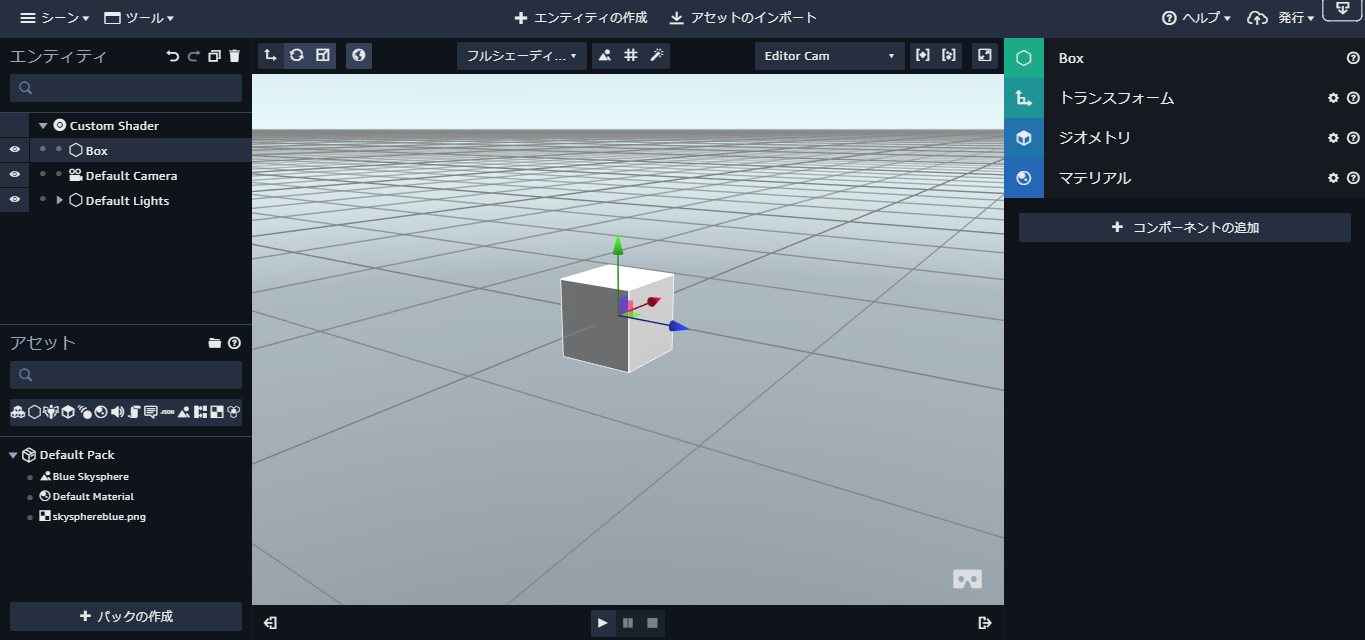
これでシーンの設定は終了です。
2. Shader Script の追加
これから Box に Script を追加していきます。
① Box を選択し、Script Component を追加。
② + ボタンから Custom Script を選択。
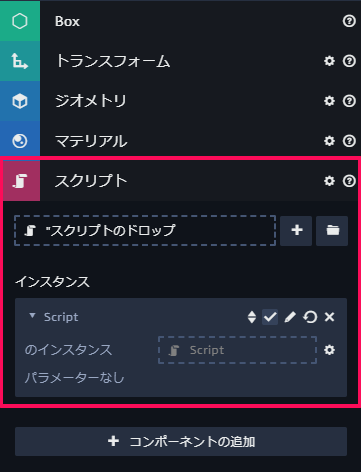
③ 鉛筆ボタンをクリックし、エディタを開く。
④ 以下のコードと置き換える。
|
1 2 3 4 5 6 7 8 9 10 11 12 13 14 15 16 17 18 19 20 21 22 23 24 25 26 27 28 29 30 31 32 33 34 35 36 37 38 39 40 41 42 43 44 45 46 47 48 49 50 51 52 53 54 |
var setup = function (args, ctx) { // The vertex shader source as a string var vertexShader = [ 'attribute vec3 vertexPosition;', 'uniform mat4 viewProjectionMatrix;', 'uniform mat4 worldMatrix;', 'void main(void) {', ' gl_Position = viewProjectionMatrix * (worldMatrix * vec4(vertexPosition, 1.0));', '}' ].join('\n'); // The fragment shader source as a string var fragmentShader = [ 'void main(void){', ' gl_FragColor = vec4(1.0, 1.0, 1.0, 1.0);', '}' ].join('\n'); // The shader definition provides fragment and vertex shader source, as // well as a list of attributes, defines, uniforms, etc., that the engine // needs to use your shader. var shaderDefinition = { attributes: { vertexPosition: sumerian.MeshData.POSITION }, uniforms: { viewProjectionMatrix: sumerian.Shader.VIEW_PROJECTION_MATRIX, worldMatrix: sumerian.Shader.WORLD_MATRIX }, vshader: vertexShader, fshader: fragmentShader }; // Create a Material from the shader definition. ctx.material = new sumerian.Material(shaderDefinition); // Save the current material for later. ctx.oldMaterial = ctx.entity.meshRendererComponent.materials[0]; // Put the material on the entity. ctx.entity.meshRendererComponent.materials[0] = ctx.material; }; var update = function (args, ctx) { }; var cleanup = function (args, ctx) { // Put the old material back on the entity ctx.entity.meshRendererComponent.materials[0] = ctx.oldMaterial; }; var parameters = []; |
⑤ 保存して、エディタを閉じる。
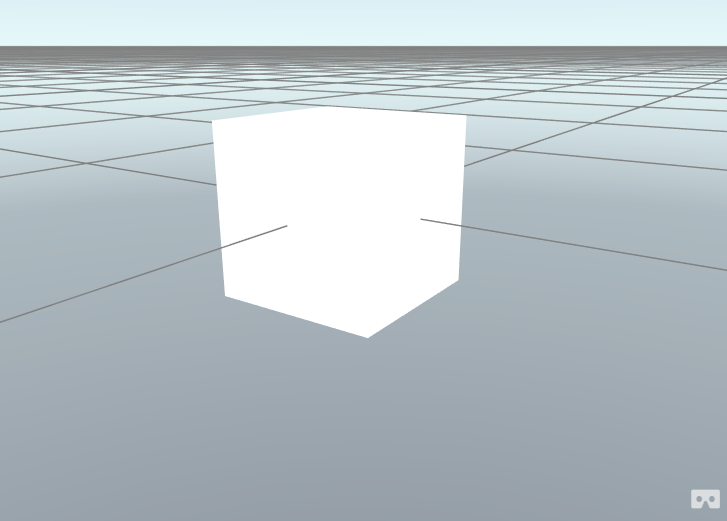
再生ボタンをクリックして、シーンを実行してみてください。
実行すると影のない真っ白な Box が表示されると思います。
※ Mac を使用している方は、以下のコードを使用する必要があります。
|
1 2 3 4 5 6 7 8 9 10 11 12 13 14 15 16 17 18 19 20 21 22 23 24 25 26 27 28 29 30 31 32 33 34 35 |
// The vertex shader source as a string var vertexShader = [ 'attribute vec3 vertexPosition;', 'uniform mat4 viewProjectionMatrix;', 'uniform mat4 worldMatrix;', 'void main(void) {', ' gl_Position = viewProjectionMatrix * (worldMatrix * vec4(vertexPosition, 1.0));', '}' ].join('\n'); // The fragment shader source as a string var fragmentShader = [ 'void main(void){', ' gl_FragColor = vec4(1,1,1, 1);', '}' ].join('\n'); // The shader definition provides fragment and vertex shader source, as // well as a list of attributes, defines, uniforms, etc., that the engine // needs to use your shader. var shaderDefinition = { defines: { PI: Math.PI // <-- add define here }, attributes: { vertexPosition: sumerian.MeshData.POSITION, }, uniforms: { viewProjectionMatrix: sumerian.Shader.VIEW_PROJECTION_MATRIX, worldMatrix: sumerian.Shader.WORLD_MATRIX, }, vshader: vertexShader, fshader: fragmentShader }; |
3. Shader を Plasma Shader にアップデート
vertexShader、_fragmentShader、および shaderDefinition を次のものに置き換えます。
vertexShader
|
1 2 3 4 5 6 7 8 9 10 11 |
var vertexShader = [ 'attribute vec2 vertexUV0;', // <-- add UV coords 'attribute vec3 vertexPosition;', 'uniform mat4 viewProjectionMatrix;', 'uniform mat4 worldMatrix;', 'varying vec2 texCoord0;', // <-- add varying 'void main(void) {', ' texCoord0 = vertexUV0;', // <-- assign the vertex UV coordinate to the varying ' gl_Position = viewProjectionMatrix * (worldMatrix * vec4(vertexPosition, 1.0));', '}' ].join('\n'); |
fragmentShader
|
1 2 3 4 5 6 7 8 9 10 11 12 13 14 15 16 17 |
var fragmentShader = [ 'uniform float time;', // <-- add 'uniform vec2 k;', // <-- add 'varying vec2 texCoord0;', // <-- add 'void main(void){', ' float v = 0.0;', // <-- add all of these magic formulas ' vec2 c = texCoord0 * k - k/2.0;', ' v += sin(c.x + time);', ' v += sin((c.y + time)/2.0);', ' v += sin((c.x+c.y + time)/2.0);', ' c += k/2.0 * vec2(sin(time/3.0), cos(time/2.0));', ' v += sin(sqrt(c.x*c.x+c.y*c.y+1.0) + time);', ' v = v/2.0;', ' vec3 col = vec3(1, sin(PI*v), cos(PI*v));', ' gl_FragColor = vec4(col*.5 + .5, 1);', '}' ].join('\n'); |
shaderDefinition
|
1 2 3 4 5 6 7 8 9 10 11 12 13 14 15 16 17 |
var shaderDefinition = { defines: { PI: Math.PI // <-- add define here }, attributes: { vertexPosition: sumerian.MeshData.POSITION, vertexUV0: sumerian.MeshData.TEXCOORD0 // <-- grab the UV coords from the mesh }, uniforms: { viewProjectionMatrix: sumerian.Shader.VIEW_PROJECTION_MATRIX, worldMatrix: sumerian.Shader.WORLD_MATRIX, time: 0, // <-- add the time uniform k: [20,20] // <-- pass the vec2 value directly, as an array }, vshader: vertexShader, fshader: fragmentShader }; |
最後に update 関数を編集します。
|
1 2 3 4 5 |
var update = function (args, ctx) { // Pass the current time via uniforms to the shader. // This will override the "time" uniform on the shader. ctx.material.uniforms.time = ctx.world.time; // <-- add this! }; |
4. シーンを実行する
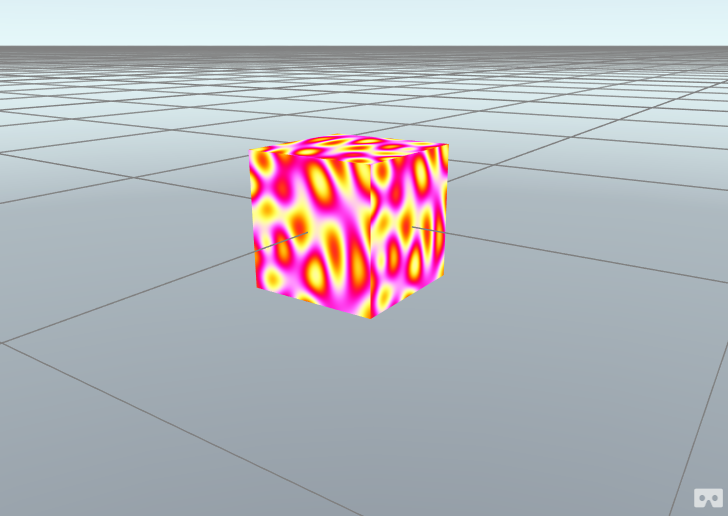
それでは、シーンを実行してみてください。
シーンが再生されると setup 関数が呼ばれ、Box に Shader が追加されます。
実行すると、以下のようになると思います。
今回のチュートリアルは以上です。
お疲れ様でした。
